All You Need to Do is ASK
In my previous post, I talked about the things I usually check in the morning on my smartphone and my idea for building a greeter program that would run on a Raspberry Pi and read me the information.
Alexa gets close to what I want, but the information presented to me is not exactly what I’m looking for. So I needed a way to customize her capabilities. Amazon already has a way of doing this via Alexa Skills (think: Apps for Alexa).
Alexa, the voice service that powers Amazon Echo, provides capabilities, or skills, that enable customers to interact with devices in a more intuitive way using voice. Examples of skills include the ability to play music, answer general questions, set an alarm or timer, and more.
Unfortunately, the Skills that were available didn’t do exactly what I wanted either.
Fortunately, Amazon has made the Alexa Skills Kit (ASK) available to developers to build their own Skills.
The Alexa Skills Kit is a collection of self-service APIs, tools, documentation and code samples that make it fast and easy for you to add skills to Alexa. All of the code runs in the cloud – nothing is on any user device.
This post will walkthrough how to get started with ASK, setting up an example skill in AWS Lambda, and connecting it with your Alexa device.
Getting Started
To get started developing with ASK, you will need an Amazon developer account. This is super-easy (especially if you already have an Amazon account for shopping/apps/etc), you just need to visit the Amazon Developers page and sign-up/activate a free account.
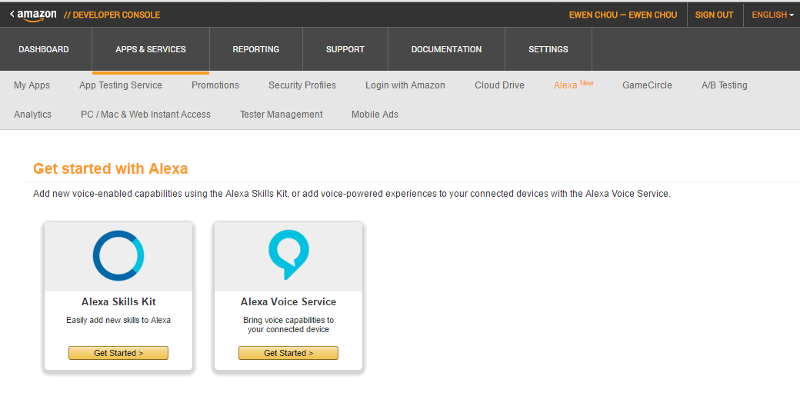
Once you’re signed in, click on Apps & Services in the navigation menu across the top of the page. Then, click on Alexa in the sub-menu. You will see two Get Started buttons, one for Alexa Skills Kit and the other for Alexa Voice Service.
We’ll come back to this page later after we’ve setup an Alexa skill as an AWS Lambda function.
AWS Lambda
Creating an Alexa Skill using Lambda is very easy. First, you’ll need an account with Amazon Web Services (AWS). Click on Create an AWS Account and follow the instructions. If you already have an Amazon account, sign-in using your usual credentials.
Lambda provides a free tier that is more than adequate for my purposes. I don’t expect any of my skills to be executed millions of times per month, nor will they consume a lot of compute time.
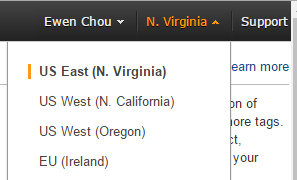
Once you have signed into the AWS Console, make sure you have selected the US East (N. Virginia) region in the top-right corner of the page because it is the only one that supports ASK right now.
On the same page, you’ll see all the AWS services listed. Near the top-left of the page you should see the Compute services.
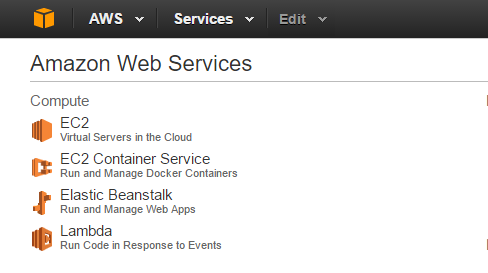
Click on the Lambda link and then click the Create a Lambda function button to get started.
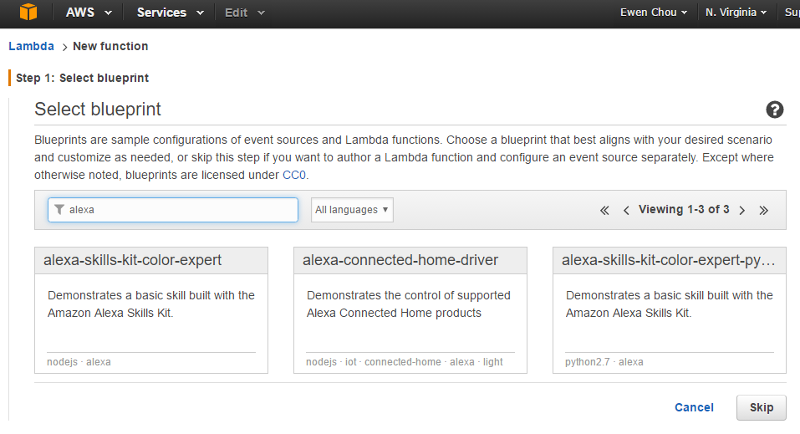
Step 1: Select blueprint
Blueprints are predefined Lambda functions that help you learn how to create your own. There are a few blueprints for ASK and you can type in alexa in the Filter field to find them. Click the alexa-skills-kit-color-expert-python blueprint to select it.
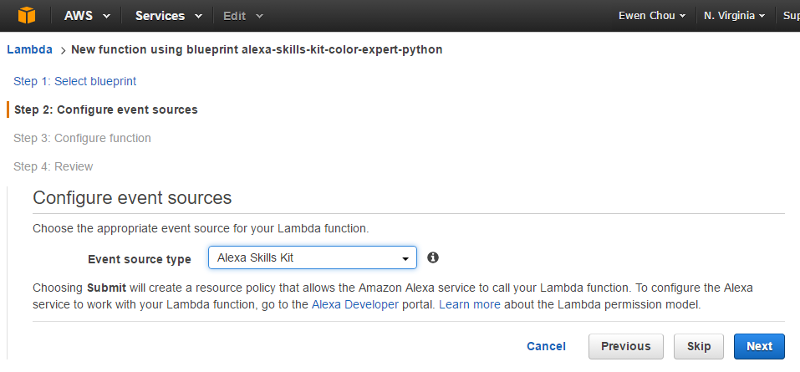
Step 2: Configure event sources
For Event source type select Alexa Skills Kit (it should already be pre-selected for you) and click Next.
Step 3: Configure function
Here is where you specify the code and some parameters for your Lambda function. First, enter a name for your new function.
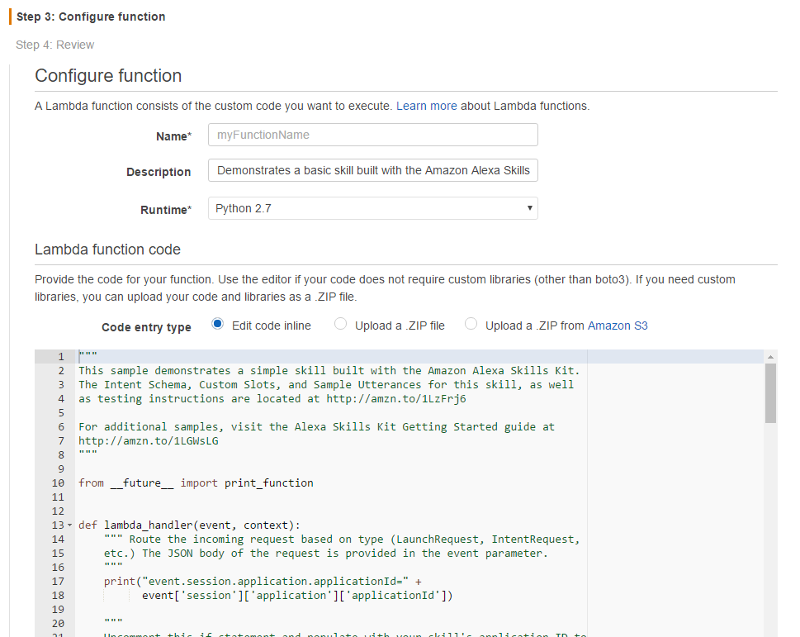
Because we selected a blueprint earlier, the code is already populated for us. This is the code that makes up the Color Expert skill. It is well documented with comments so it was pretty easy to figure out what it does (and how to write my own skills). I recommend reading through it to get a general understanding of how it works.
Below the code section, you will need to specify a few more parameters.
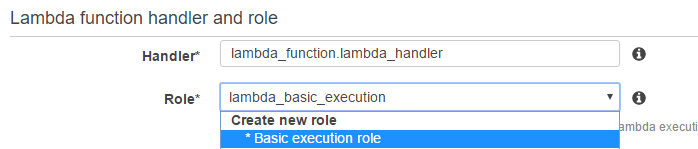
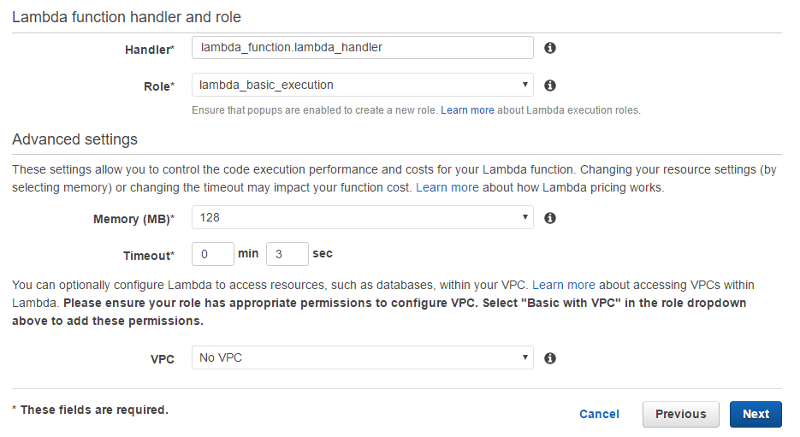
Handler
This is the name of the file plus the entry point for your Lambda function. Together it tells Lambda what to run when your function is invoked. It is already predefined for the blueprint as lambda_function.lambda_handler, which means on invocation it will run the lambda_handler() function in the lambda_function.py file.
Note: You can change the Handler to whatever you want as long as it matches up with your code. In general, it’s easier to stick with these conventions when writing your own code and uploading as a zip.
Role
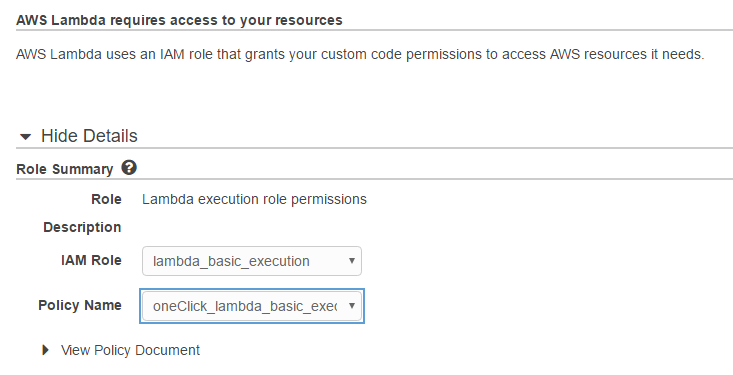
For Alexa Skills, you only need a Basic execution role. Selecting it under Create new role will allow you to create a reusable role that you can select.
Advanced Settings
Now that you’ve specified the Handler and Role you can also configure the Advanced Settings. The default values should be adequate for the majority of Alexa skills. Once you’ve reviewed your settings, click Next to continue.
Step 4: Review
This page is a summary of your new function. If everything looks OK, click the Create function button to finish.
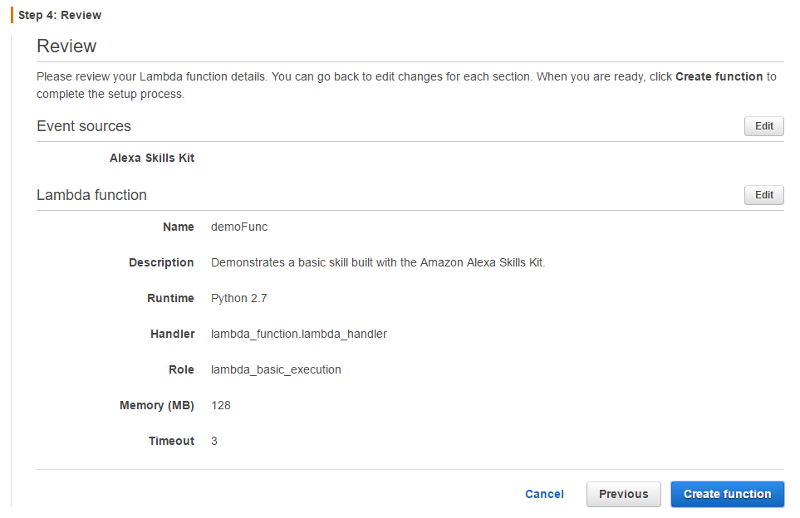
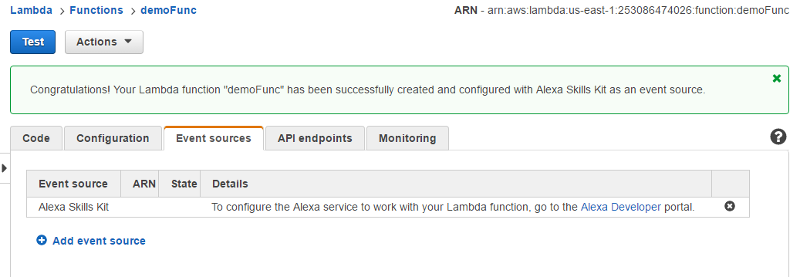
Congratulations! You’ve created your first AWS Lambda function. Copy the ARN string on the top-right of the page. You will need this value to “hook up” your Alexa Skill.
Billing Alarm
Although the free tier should be enough for personal use, it’s a good idea to setup an Alarm in AWS that will send you an email if you start getting charged for usage (just in case).
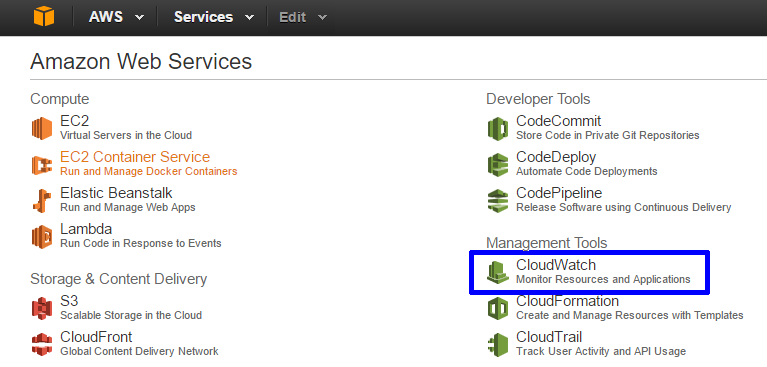
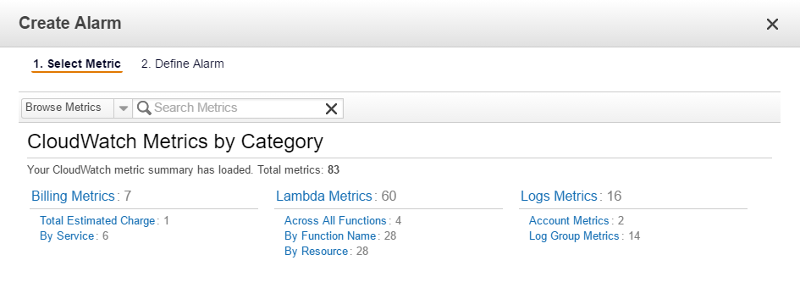
Back on the AWS Console home page, there is a section for Management Tools. Click on the link for Cloud Watch.
Click the Create Alarm button either in the Alarm Summary section of the main Cloud Watch page or on the Alarms page (click Alarms on the left menu).

Next, you’ll be asked to select metrics for your alarm. I kept it simple and selected Total Estimated Charge under the Billing Metrics category.
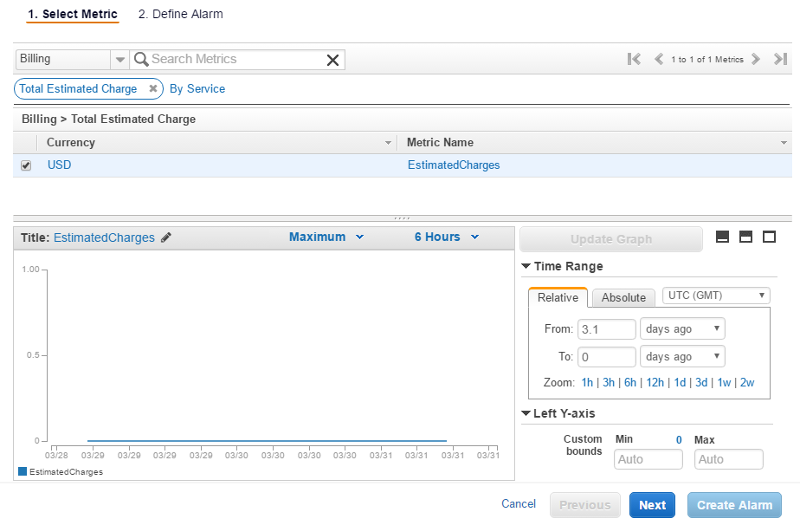
After you click on Total Estimated Charge, click on the checkbox to select the metric for USD (there was only one for me) and click the Next button.
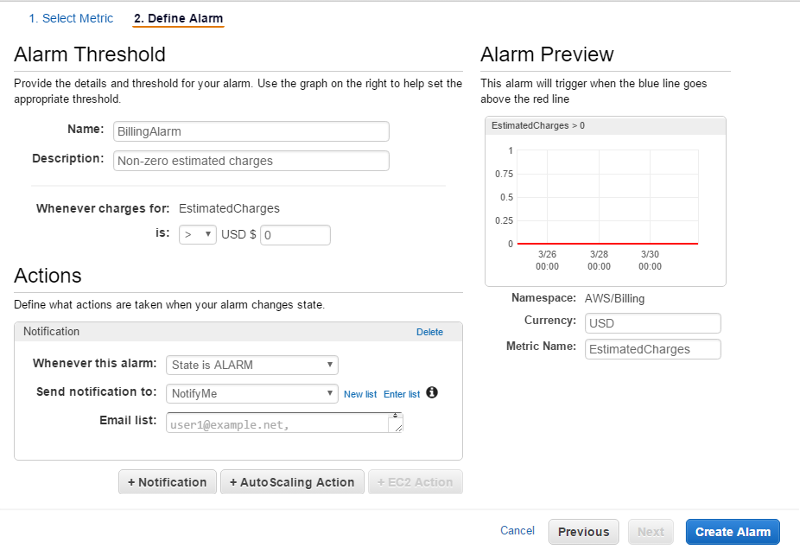
Give your alarm a name and description. Remember to change the setting to EstimatedCharges > 0. Mine was set to >= 0 by default.
In the Actions section, select:
- Whenever this alarm: State is ALARM
- Send notifiction to: NotifyMe
- Email list: put your email address
Click the Create Alarm button to finish.
Alexa Skills Kit
Back on the Amazon Developer site, click on the Get Started link for Alexa Skills Kit from earlier in this post. This will bring up your list of Alexa Skills. Click on the Add a New Skill button.
Skill Information
Fill in the Name and Invocation Name fields. These can be anything you want. The Invocation Name is what users will say to launch your skill. For example, if you use an invocation name of “color picker”, you would say,
“Alexa, open color picker”
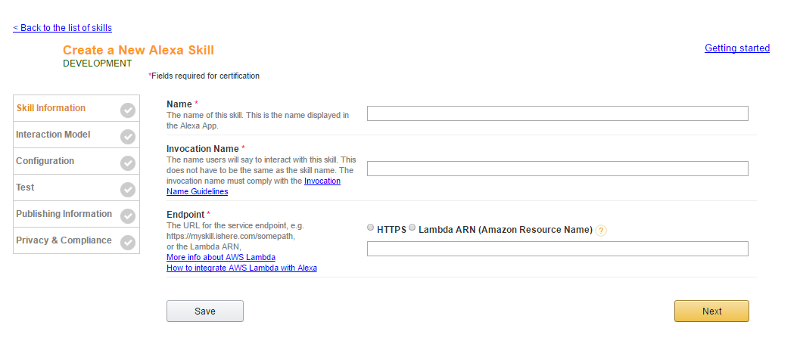
The Endpoint field is where you put the ARN string you copied earlier. Make sure to select the Lambda ARN radio button as well.
Click the Next button to continue.
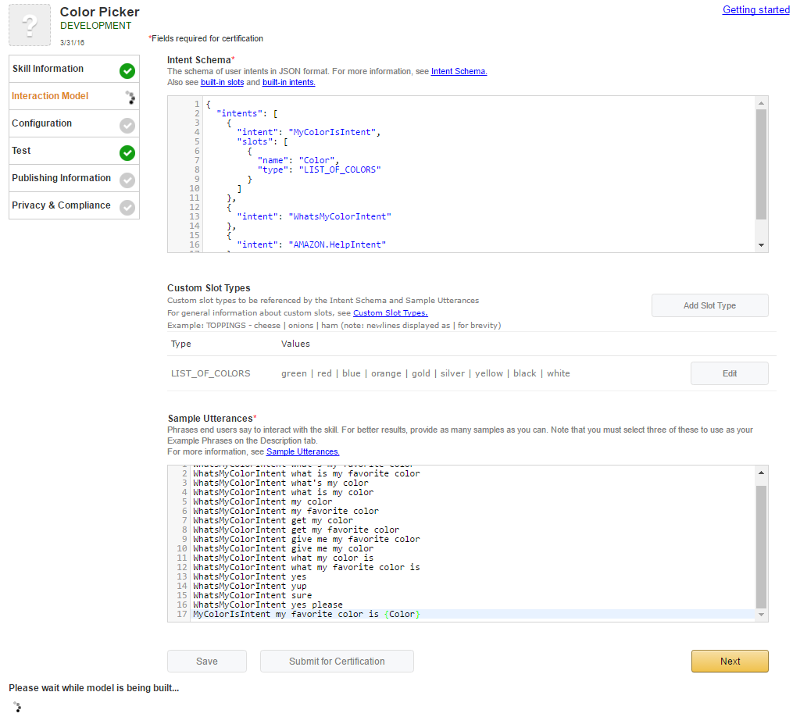
Interaction Model
On the next screen, you will need to provide the Intent Schema, Sample Utterances and (optionally) any Custom Slot Types that are used for your skill.
For the Color Expert blueprint,
Intent Schema
{
  "intents": [
    {
      "intent": "MyColorIsIntent",
      "slots": [
        {
          "name": "Color",
          "type": "LIST_OF_COLORS"
        }
      ]
    },
    {
      "intent": "WhatsMyColorIntent"
    },
    {
      "intent": "AMAZON.HelpIntent"
    }
  ]
}
Custom Slot Types
Create a type called LIST_OF_COLORS
green
red
blue
orange
gold
silver
yellow
black
white
Sample Utterances
WhatsMyColorIntent what's my favorite color
WhatsMyColorIntent what is my favorite color
WhatsMyColorIntent what's my color
WhatsMyColorIntent what is my color
WhatsMyColorIntent my color
WhatsMyColorIntent my favorite color
WhatsMyColorIntent get my color
WhatsMyColorIntent get my favorite color
WhatsMyColorIntent give me my favorite color
WhatsMyColorIntent give me my color
WhatsMyColorIntent what my color is
WhatsMyColorIntent what my favorite color is
WhatsMyColorIntent yes
WhatsMyColorIntent yup
WhatsMyColorIntent sure
WhatsMyColorIntent yes please
MyColorIsIntent my favorite color is {Color}
Note: You can find more details from Amazon’s documentation on Developing an Alexa Skill as a Lambda Function. It covers some of the steps we went through earlier and provides additional information.
Click the Save button. The Amazon service will take some time to build the interaction model for the skill. Once it is done, it is ready for testing!
Testing
Clicking on the Test link in the left menu will bring you to Amazon’s built-in testing page for Alexa Skills. This is the fastest way to test the interaction with your skill, and it doesn’t even require an actual Alexa device.
Simply type the command you want to send to the Skill (as if you were speaking it) and click the Ask button to test.

It will show you the JSON payloads for both the Lambda request and response, and you can click the “play” button to listen to Alexa’s response (cool!)
I spent more time than I care to admit playing around on this page :D
At this point, you can also interact with your skill using any Alexa device that you have linked to your Amazon account. All the skills that are in Development status are available to you on your Amazon account and you can see them in the Skills section of the Alexa mobile or web apps.
That’s it! You’ve created your first Alexa Skill using Lambda and hooked it up to your developer account.
What’s Next?
Wow, this post is a lot longer (and took much more time to write) than I originally anticipated. So I’ll write about the Alexa Skills I created for my “morning greeter” project in a future post.
For now, I highly recommend reading through Getting Started with the Alexa Skills Kit to get a better understanding of how things fit together.
I hope this information was useful and will help you get started developing your own Alexa Skills.
As always, thank you for reading and keep an eye out for my next blog post.